Step One: Introduction and Discussion (Review) 10
Minutes
This lesson is intended to compliment many
kinds of language arts lesson that involve communication
skills and strategies. More specifically, students will
consider contemporary issues involved in the process of
recycling, waste and ecology. This new knowledge will be
used to support design-thinking strategies about how to
repurpose and reuse common waste materials that cannot be
easily recycled.
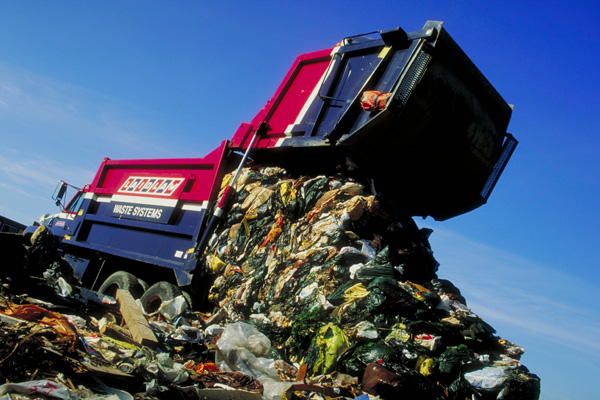
Waste that is not recycled goes
into large landfills, such as the one pictured above. Begin
your lesson by discussing historical and contemporary
issues related to recycling, waste and the environment.
Start your discussion about common things students buy and
throw away on a daily basis. As an opening question ask
students to tell you what they brought for lunch (or intend
to buy in the cafeteria). Begin to write down some of the
items on the board. Encourage them to talk not just about
the food they brought but also about the materials used to
package and wrap their lunches.
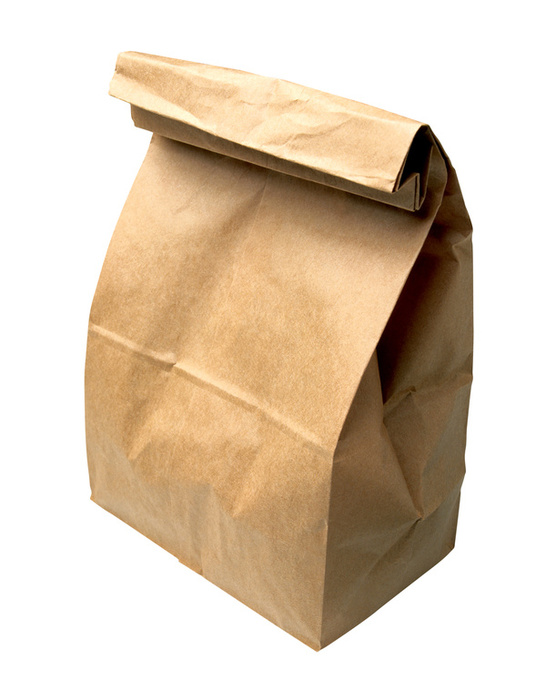 Ask students about
the kinds of materials that they have in their lunch
bags/boxes.
Ask students about
the kinds of materials that they have in their lunch
bags/boxes. Some common materials you may find range from
plastic bags, soda cans, paper bags, plastic forks and
spoons etc. After getting some responses, ask where most of
the trash generated from their lunch ends up?
Talk
about the difference between trash and recyclables.
Students should have some previous knowledge about what is
recyclable and what is not but make sure to take a moment
to gauge their understanding during this lesson.
Now
introduce the concept of a waste stream: a set of waste or
recyclable materials generated by a particular activity.
Write down the word “ lunch” on the
blackboard. Circle the word and begin to create waste
streams stemming from the lunch (ie. Paper, plastic,
organics, metal etc. ).
Everything we throw away
contributes to the waste stream. We have developed ways to
reduce the amount of trash we contribute through a process
called “ recycling” . Define recycling for
students: recycling involves recovering used materials to
process into new products or materials. The process is
intended to prevent the waste of potentially useful
materials.
Ask students what kinds of wastes they recycle
at home or in school? Which waste is recycled the most in
the U. S. ? (answer is paper) Talk about what is locally
recyclable in your region and in your school. Close this
discussion and explain that in this activity we will think
about new and creative ways to re-use materials that cannot
be easily recycled like electronic wastes, clothing,
certain plastics and other materials.
Step Two:
Investigating Impacts and New Uses (Investigate) (10
minutes)
Now let’ s get down to business.
Talk with students about some of the wastes we commonly
recycle including plastics, metals and paper. Define these
wastes to students:
• Plastics
- Certain kinds of plastics may not be recyclable
because they are made of special polymer structures that
won’ t melt down with other plastics.
•
Metals - Aluminum, tin and steel are the
most common materials. However, gold and other heavy metals
are recycled from computers and other electronic waste.
• Paper and Cardboard - Some
paper products are not recyclable because there is a wax
layer coated on the paper
• Organic
Matter - Organic wastes (like food scraps
and garden waste) can be composted (broken down naturally)
and used to fertilized crops or gardens. Dairy and meat
products cannot be composted in most systems.
•
Glass - Most glass is easily
recycled
Now lets consider wastes that we don’
t often recycle or cannot recycle because of their material
composition. Most wastes are not recycled because it’
s difficult to isolate the raw material components. Ask
students to think about everyday things that are not easily
recycled:
• Clothing and Textiles
• Styrofoam - Styrofoam is often used as a
generic term for expanded polystyrene foam manufactured
from petroleum.
• Plastic Bags
•
E-Waste - Electronic wastes including things
like televisions, computers, and other electronics.
After
discussing these examples, ask students about the
importance of recycling. What’ s the big deal anyway?
How does recycling relate to me and why?
Recycling
helps save energy and water by preventing the need to
manufacture new materials or products. Recycling also helps
save space in landfills, eliminating many water quality and
land-use issues. (Note: every recycling program has its
flaws and is specific to the region where it is
implemented--the goal of this lesson is to help students
understand the need to conserve resources and think
creatively about re-using materials).
Math
Connection
As a math extension, you can calculate
the amount of energy or water saved by recycling one
bottle, can or other material. You can also calculate the
volume of space saved in a landfill by recycling a
particular material. There are many tools available online
like the
Environmental Defense Fund's Paper Calculator to
help you or students make these calculations.
Now
setup your design challenge. Explain that students will be
divided into “ Green Design Teams” . Each team
will focus on one material that cannot be recycled easily
like Styrofoam or plastic bags. Teams will be challenged to
sketch and design a prototype that communicates a new use
for their raw material. Students will then present their
ideas and discuss how these designs help mitigate
environmental impacts. Make sure that your objectives are
focused for this activity.
Warm-Up Activity Extension:
Recycled Knitting and Crochet
If time permits use
this warm-up activity to get students thinking creatively
about re-using materials that cannot be recycled easily. An
easy and simple activity is to knit or crochet with plastic
bags or old clothing. To create “ yarn” simply
cut up a continuous strip of material from a plastic bag or
old t-shirt by cutting a circular path around the base or
top of the bag or shirt. Once you have 5-10 feet worth of
“ yarn” to work with, you can teach students
how to knit or crochet. (
https://www. theyarnco.
com/instruction. php ). A simple 10-20 minute activity
you can do with students is making a 4" by 4" potholder or
dish rag out of old t-shirts. See
https://www.
instructables.
com/id/Knit-a-Dishcloth-from-old-Clothes/
Another
great idea is to make a loom with students to weave
together your plastic yarn or to simply hand weave the
plastic into a pouch, basket or bag. You can make a loom
using an old picture frame, some cardboard and clamps. (see
https://www. hallnet. com/Build. html )
1.
Using a frame that is about 24 - 30 inches wide the first
step is to warp your loom.
2. First, take a
very long piece of thread; wool or thick cotton work well.
Tie one end in a double knot around the bottom
cross-piece of the loom.
3. Loop the thread under
and over the top cross-piece and bring it down to the
bottom and do the same. The warp thread should be kept
tight but not so tight that you can't lift the warps up
with one finger.
4. Continue looping around the top
and the bottom cross-pieces making a figure eight pattern
each time you go up and back.
5. When you have
around 20 or so loops, you can make more or fewer if you
like, tie the warp thread off at the top cross-piece.
6.
Now it’ s time to learn weaving on your frame
loom. You will need a chopstick for this next step.
7. The first step is to cut a length of weft yarn
that is long enough to make several passes across the loom,
about 4 feet will do.
8. Next, insert the chopstick
into the warp threads going from one side of the loom to
the other and just above where the threads cross in the
middle of the loom. Then pull the chopstick down to the
bottom of the loom. This creates tension in the warp
threads. The thread will fall down towards the chopstick.
9. Now, take the shed stick - the long flat piece of
wood you made at the same time as the loom - and weave it
in and out of the warp threads, going under the lower
threads and over the top ones
10. With one
hand on either end of the shed stick, twist it so that it
opens a new shed. Pass your ball of weft yarn through this
shed from left to right.
11. Don't pull the yarn
tight! Make an arc as the yarn goes across the warp threads
from left to right. This will leave enough slack so that,
as you continue to weave, the tension in the piece will not
cause the sides to pull together.
12. Now flatten
the shed stick again and pull it out of the loom. Your ball
of wool should be on the right and you will be able to see
the first two rows of weaving. Using the tines of the fork,
push the weft yarn from the last shot down towards the
first row. Pack it down nice and tight.
13. You now
have a natural shed once again and you can pass the ball of
yarn back from the right to the left. Again, don't pull it
tight, try and leave a small arc to create some slack.
14.
With the shed stick repeat the previous steps, going
under the lower threads and over the top threads. Twist the
shed stick to open up a new shed and pass your ball of wool
back from the left to the right. Remove the shed stick and
pack the weft threads together with your fork.
Step Three:
Let the Design Challenge Begin! (Frame/Reframe -
Generate) (20 minutes)
After design teams have
been assembled. Give each team a category or material to
work with: electronic waste, old clothing, plastic bags,
juice pouches and yogurt containers, soda can tabs and caps
among others. (Note: using certain e-wastes may be
dangerous, please use your discretion and when in doubt use
multiples of a safe category). Each team should
get a box filled with their material waste.
As an
extension, ask each team to independently research their
waste material area - what are some of the specific
environmental impacts associated with the material
and why can’ t it be recycled?
Focus teams by
suggesting that they design an accessory or body armament
that can easily clip onto an existing piece of clothing or
some part of their body. Reference military designs,
science uniforms or NASA space suits for ideas. (See
PDF)
Each team should be given 15-20 minutes to
brainstorm and write down some ideas about what they can do
with their material. Each team should generate 2-3 sketches
from their brainstorm with a description of each. Require
that each design be something functional, meaning it must
be something a consumer can wear or use in her or his every
day life.
- Soda-tab purse
-
Juice Carton Wallet
- Cardboard hats, jackets or
anything!
- Plastic bag ropes
- Ethernet Hats
Consider using some examples found in the
Cooper-Hewitt’ s National Design Triennial Catalog to
further drive home the innovative techniques and strategies
designers are using in relationship to sustainability. For
instance the design firm Fin has invented
AgriPlast , a
plastic alternative that can be used for making eating
utensils, suitcases, and protective caps. It is made from
50- 75% field grass that surrounds the manufacturing
facilities of Biowert, AgriPlast’ s maker, and
25- 50% polyethylene, polystyrene, or polypropylene.
Fin Spring/Summer 2010 Collection Fin uses organic bamboo
and wool, recycled polyester, and wild silk in its clothing
designs.
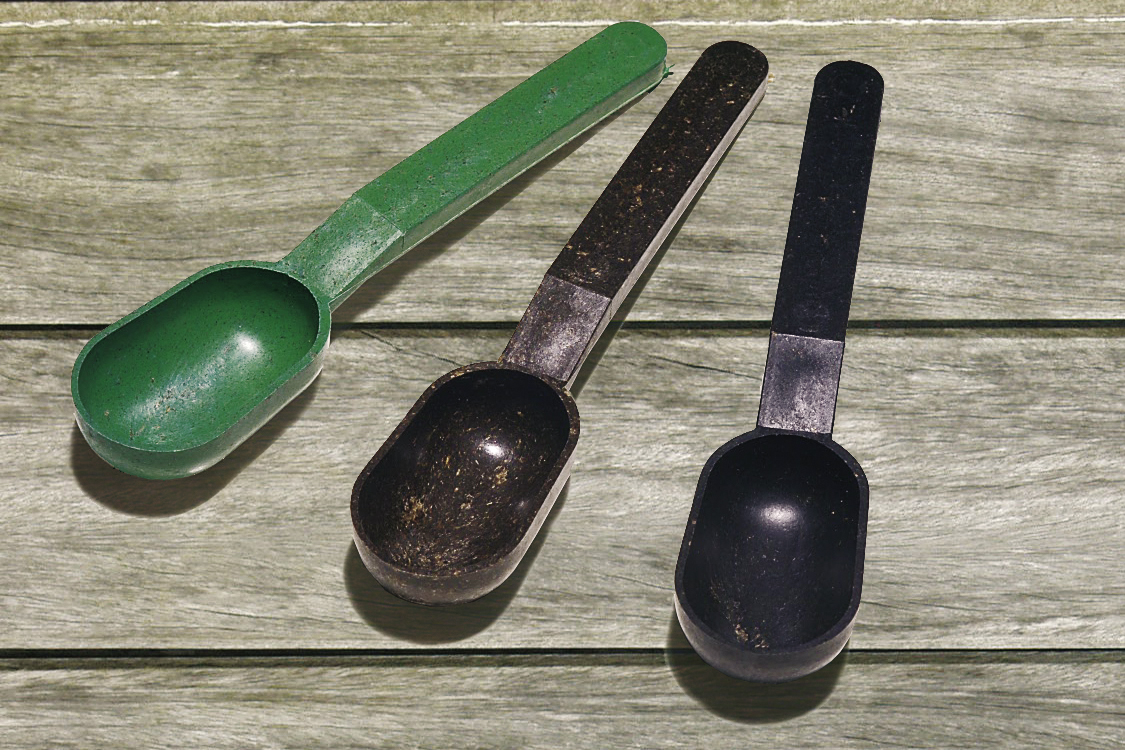
These spoons are made from the biodegradable
plasic alternative, Agriplast. Alpaca Velvet, Ditto, Gather
006, and Horsehair Striae 003 Textiles -
Horsehair Striae 003, Alpaca Velvet, Gather 006, and Ditto
are textiles designed and produced by Maharam which
exemplify the company’ s ongoing desire to live by
the 3Rs (reduce, reuse, recycle) while creating beautiful
and high-performing textiles. Ditto for instance uses
primarily post-consumer recycled polyester, mainly from
plastic bottles, to create a performance textile used
primarily by the health sector.
Step Four: Design Lab (Edit
and Develop) (30 minutes)
Now that each team has some
ideas ready, ask a team leader to select one design to work
with. Challenge each team to come up with a 3D model or
design from these materials. Use materials like tape,
string, glue and flexible wire to assist students in
creating their body ornaments.
Step Five: Storytelling
(Share, Evaluate and Finalize)
After designing a
prototype for their new designs, each team will now develop
a story or explanation for their creations. Ask each member
of the team to tell a story about how the design is used,
what materials it saves from the trash and how this may
positively impact the environment.
Share stories from each
team and discuss as a class some favorite designs and
ideas.
Step Six: Reflect (Articulate)
To close
your lesson, reflect on some of the major concepts covered.
Remind students about the importance of recycling,
conservation of materials and the pivotal role of the
designer to eliminate wastes and come up with new and
functional designs that can be used in the real world.